HOW TO Install GAIA-I on FOCAL SOPRA No.2s
 I thought it might be helpful and valuable to add a few comments and pictures to show how to install GAIA-I Acoustic Isolators on FOCAL SOPRA No.2 speakers.
FIRST THINGS FIRST – A DISCLAIMER:
First a disclaimer that if you want to follow these steps and install GAIA-I on your FOCAL SOPRA No.2., you are doing at your own will and that I WILL NOT BE HELD accountable to any damage that you may cause to your equipment. I will NOT be held accountable. Proceed if you are in agreement of this. If you are unsure, please DO NOT proceed. I want to make sure this is out of the way.
Summary:
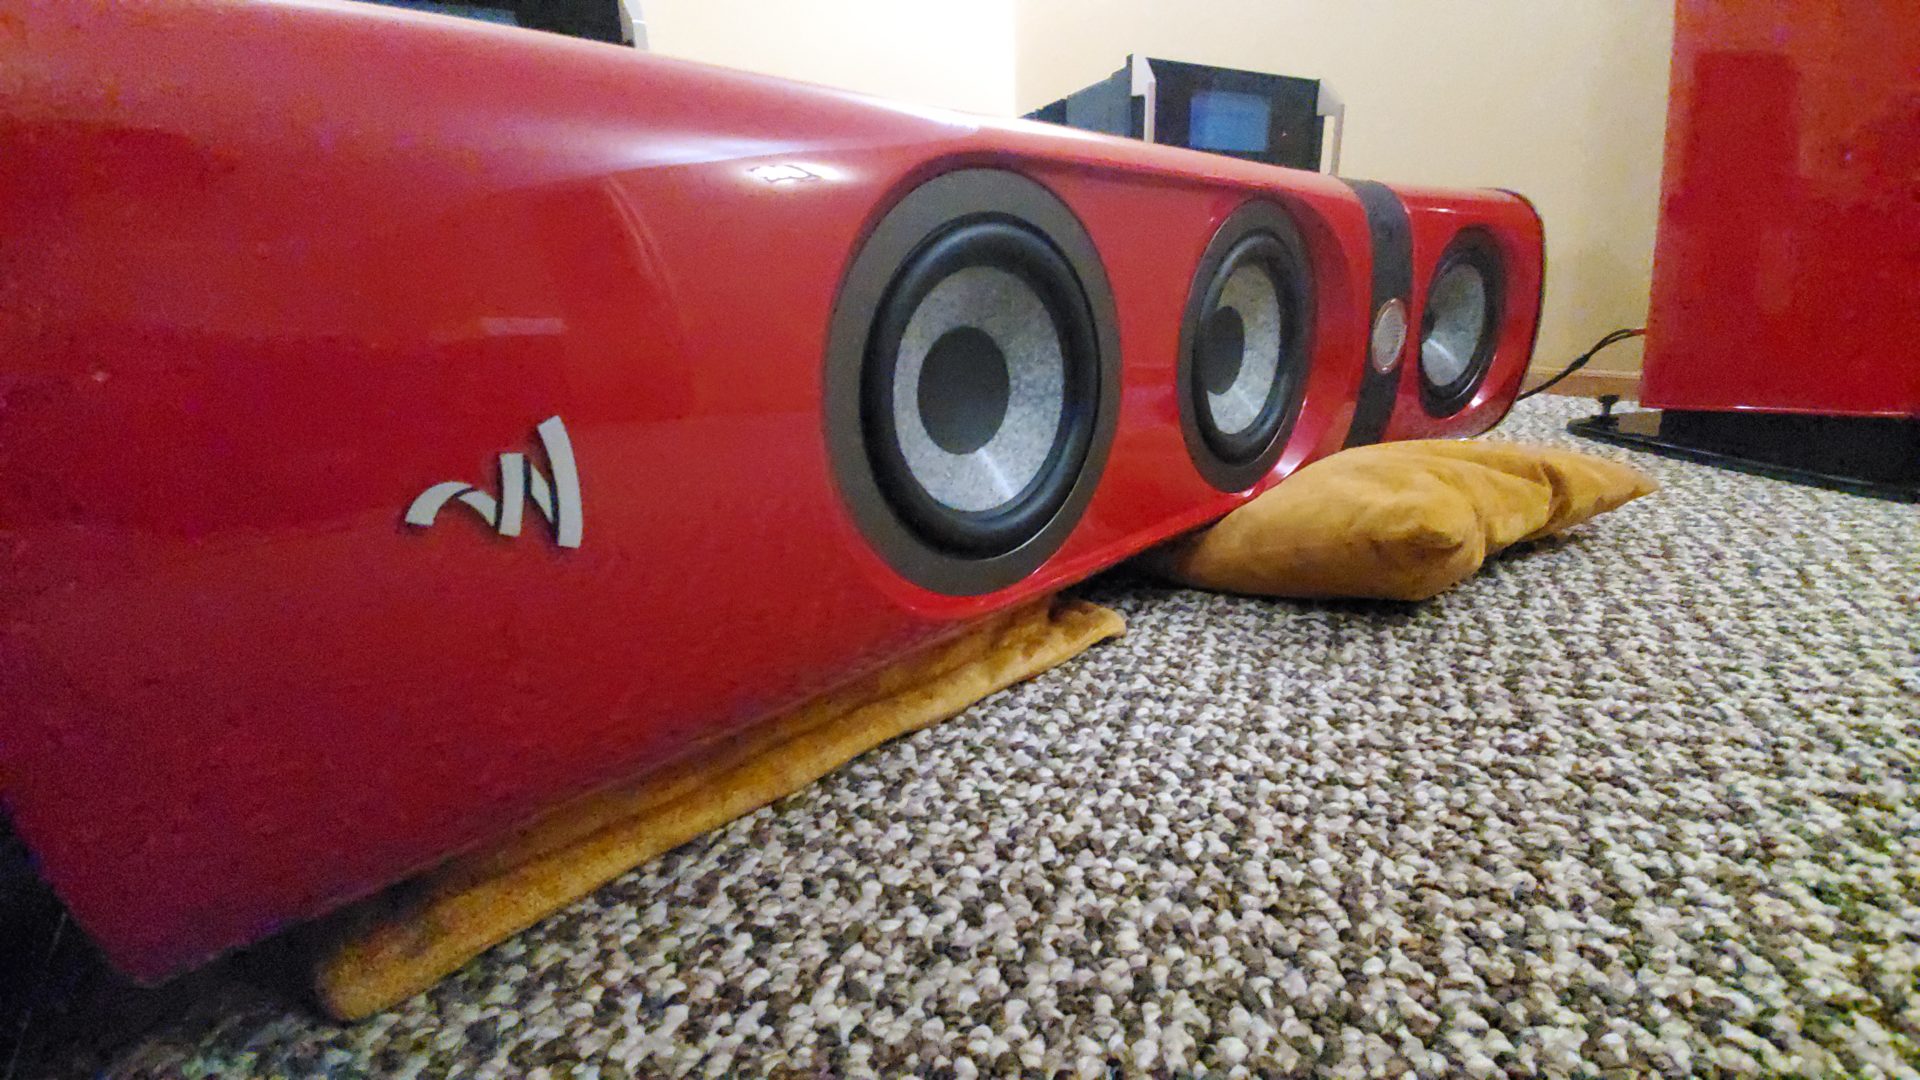
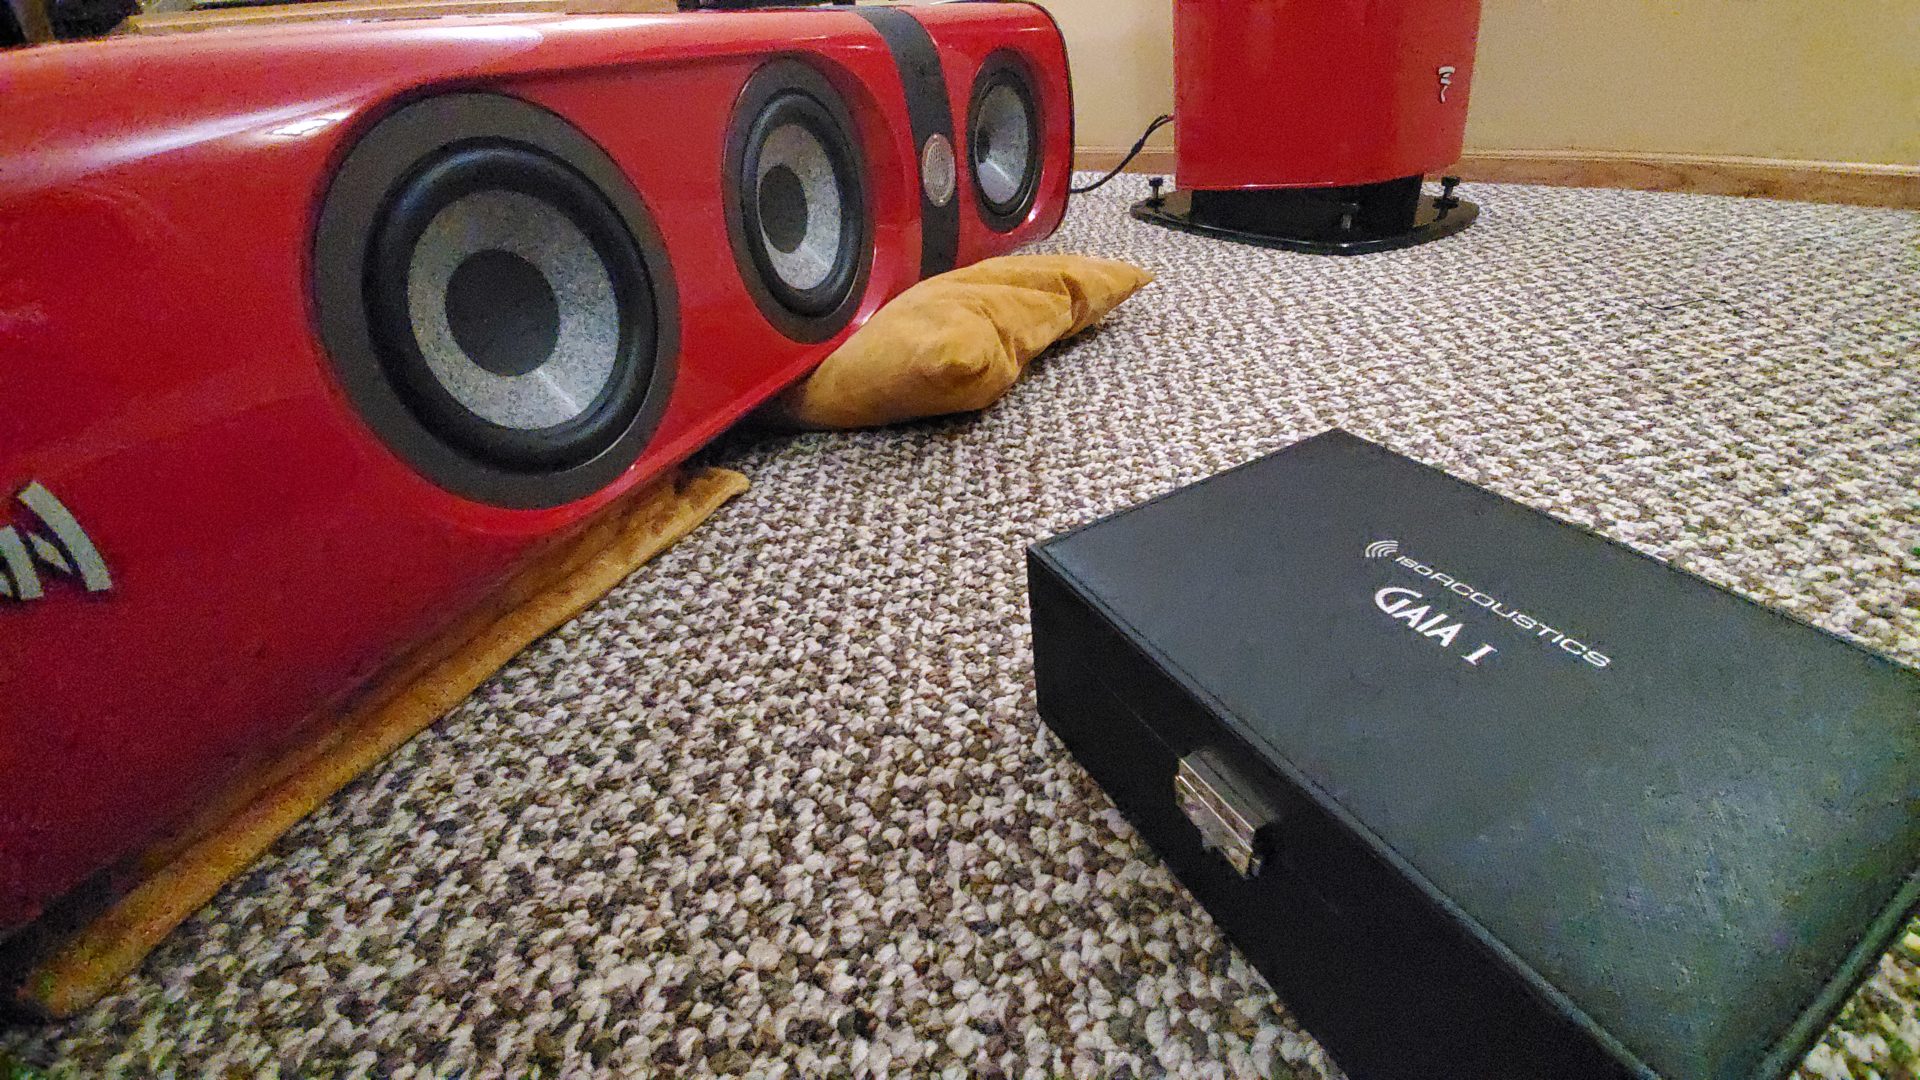
The FOCAL SOPRA No. 2, come with pre-installed Spikes in the front and in the back. In order to install GAIA-I acoustic isolators, the factory spikes need to be first uninstalled. The back spikes can be easily unscrewed – no problem there. However, the front spiked don’t go all the way out by nature. Therefore, one must ever-so-lightly loosen the speaker’s base plate (the heavy tempered glass platform) and make room for the front spike to be taken out carefully.
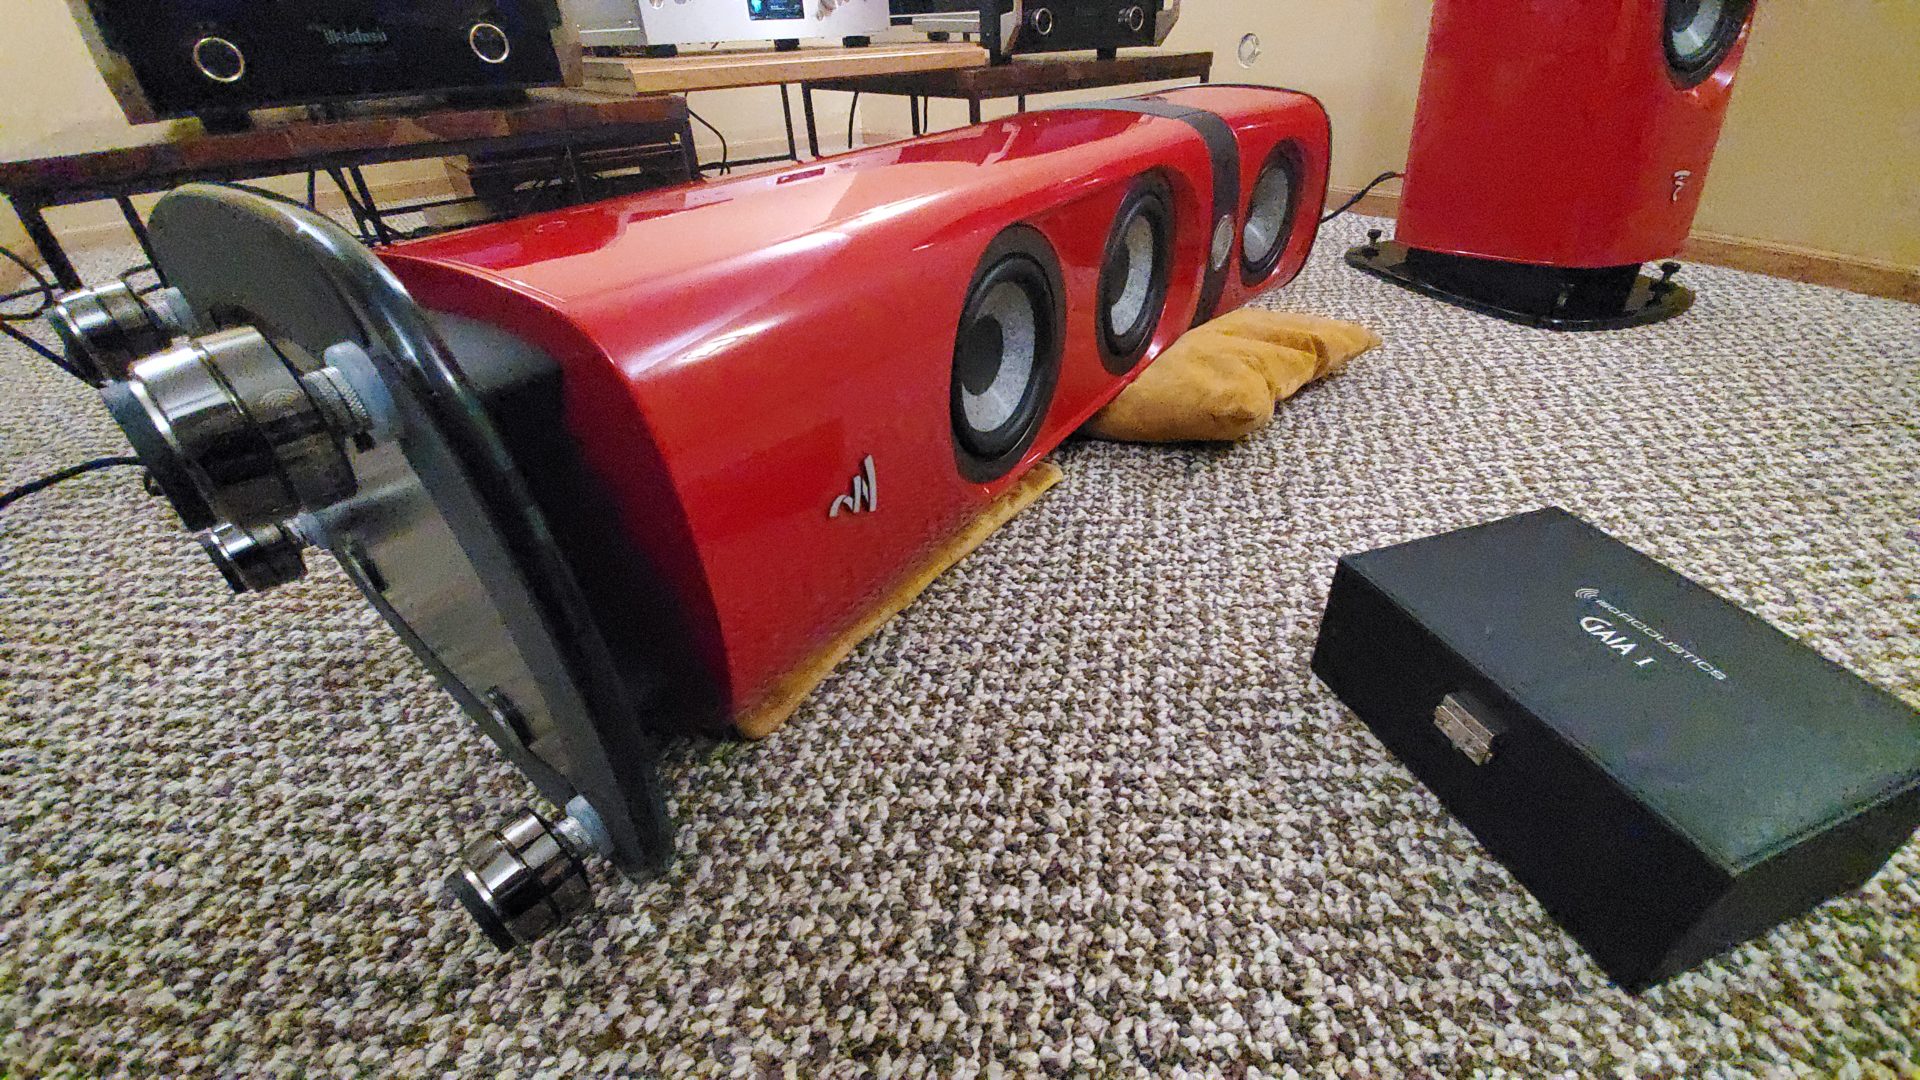
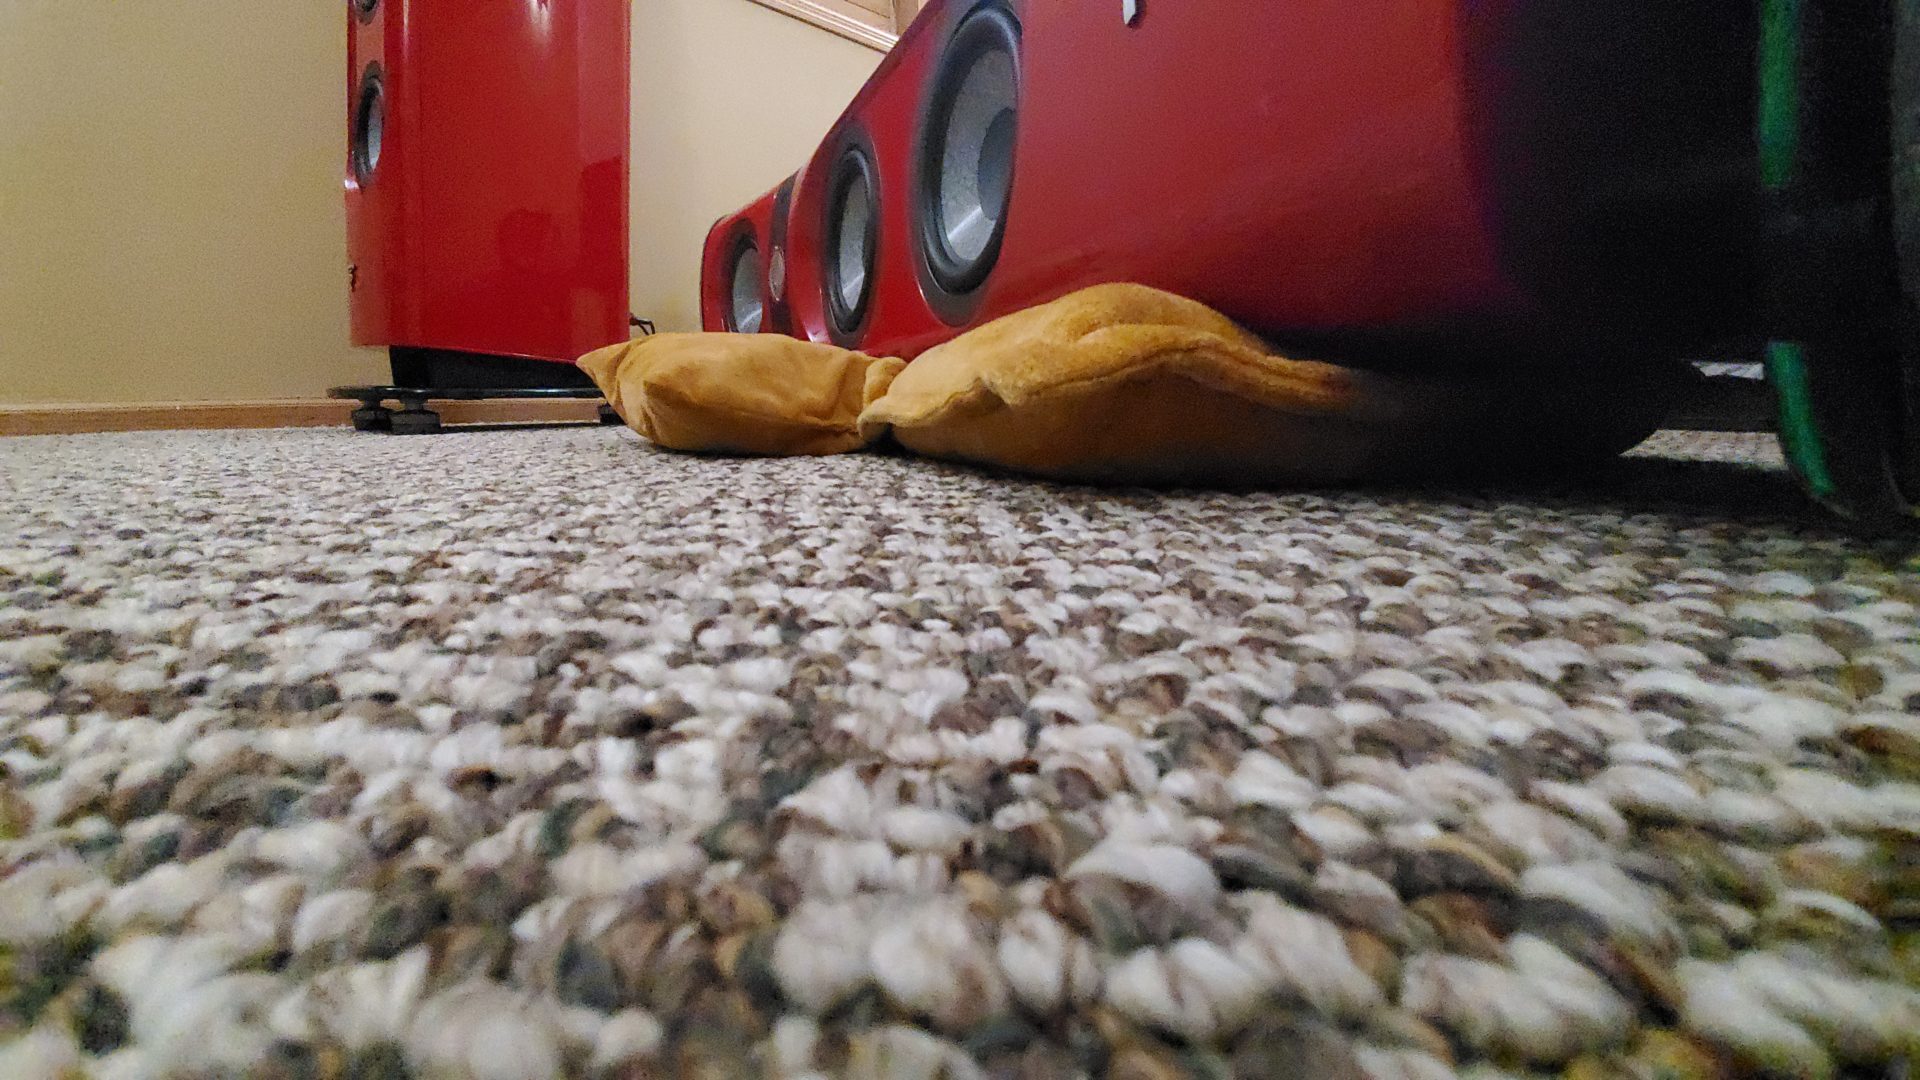
- Step 1: Lay down a few pillows on the floor
- Step 2: Get someone to provide extra helping hands and gently tilt and lay down the speaker sideways, exposing the underside of the glass base plate.
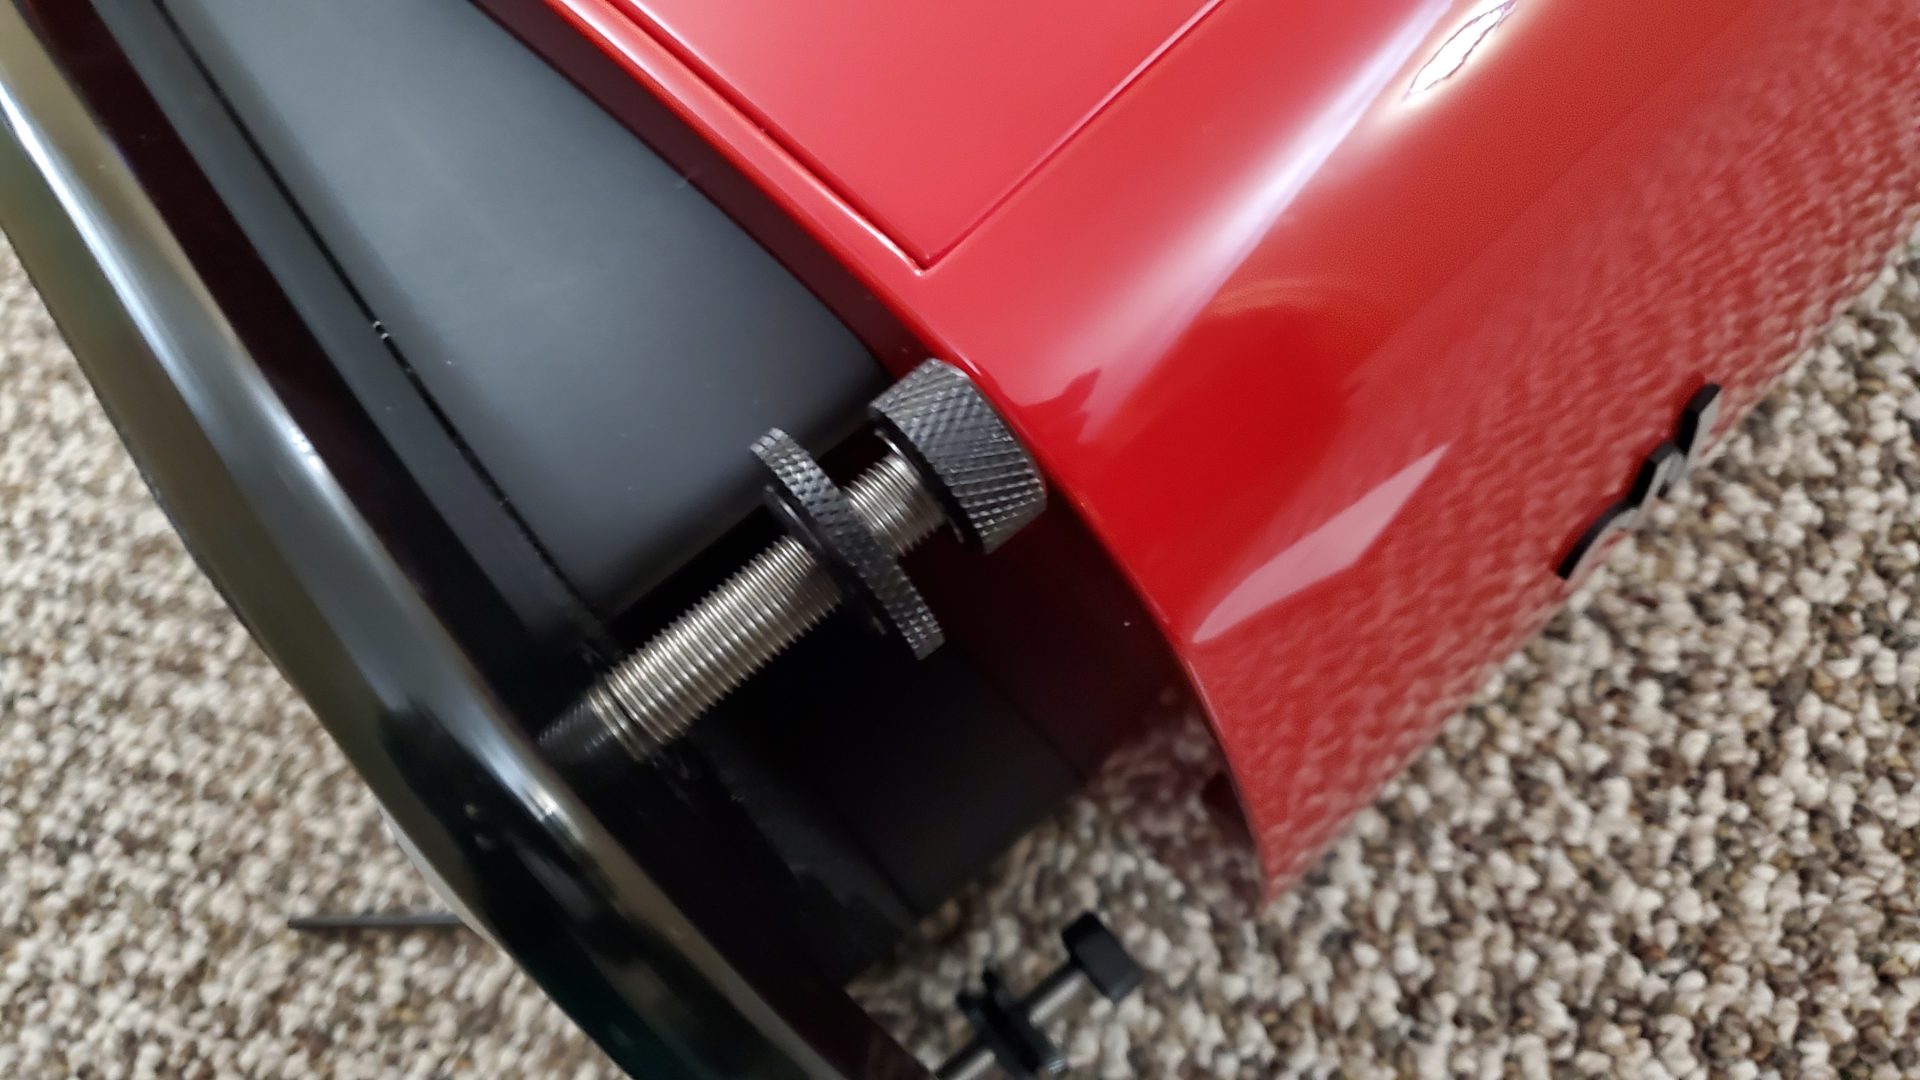
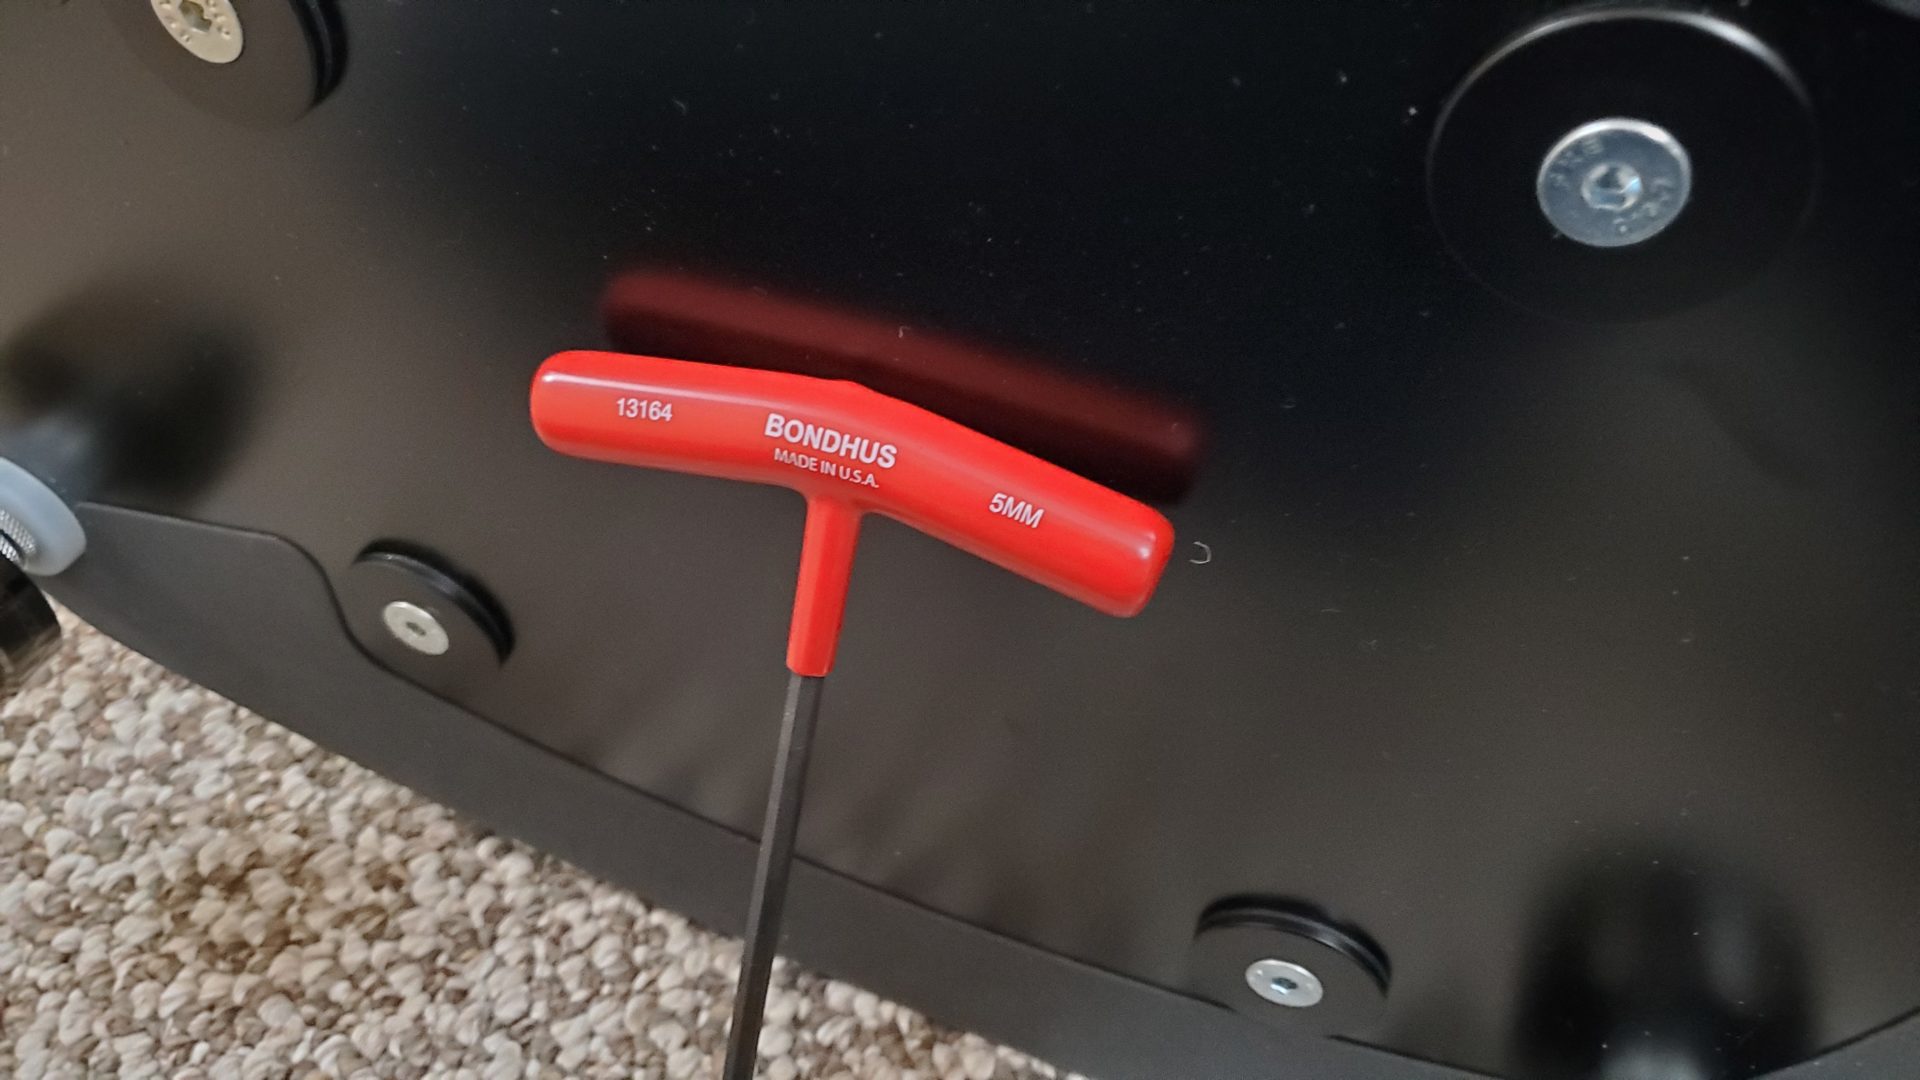
- Step 3: Get yourself a 5mm hex screwdriver and very gently, unscrew the 4 hex screws – JUST a tad bit. Only enough to gently wiggle and pull out the base plate.
- Step 4: Ever so lightly, pull out the base plate with both hands, just a tad bit. Just enough to make room for the front spikes to be unscrewed and take out.
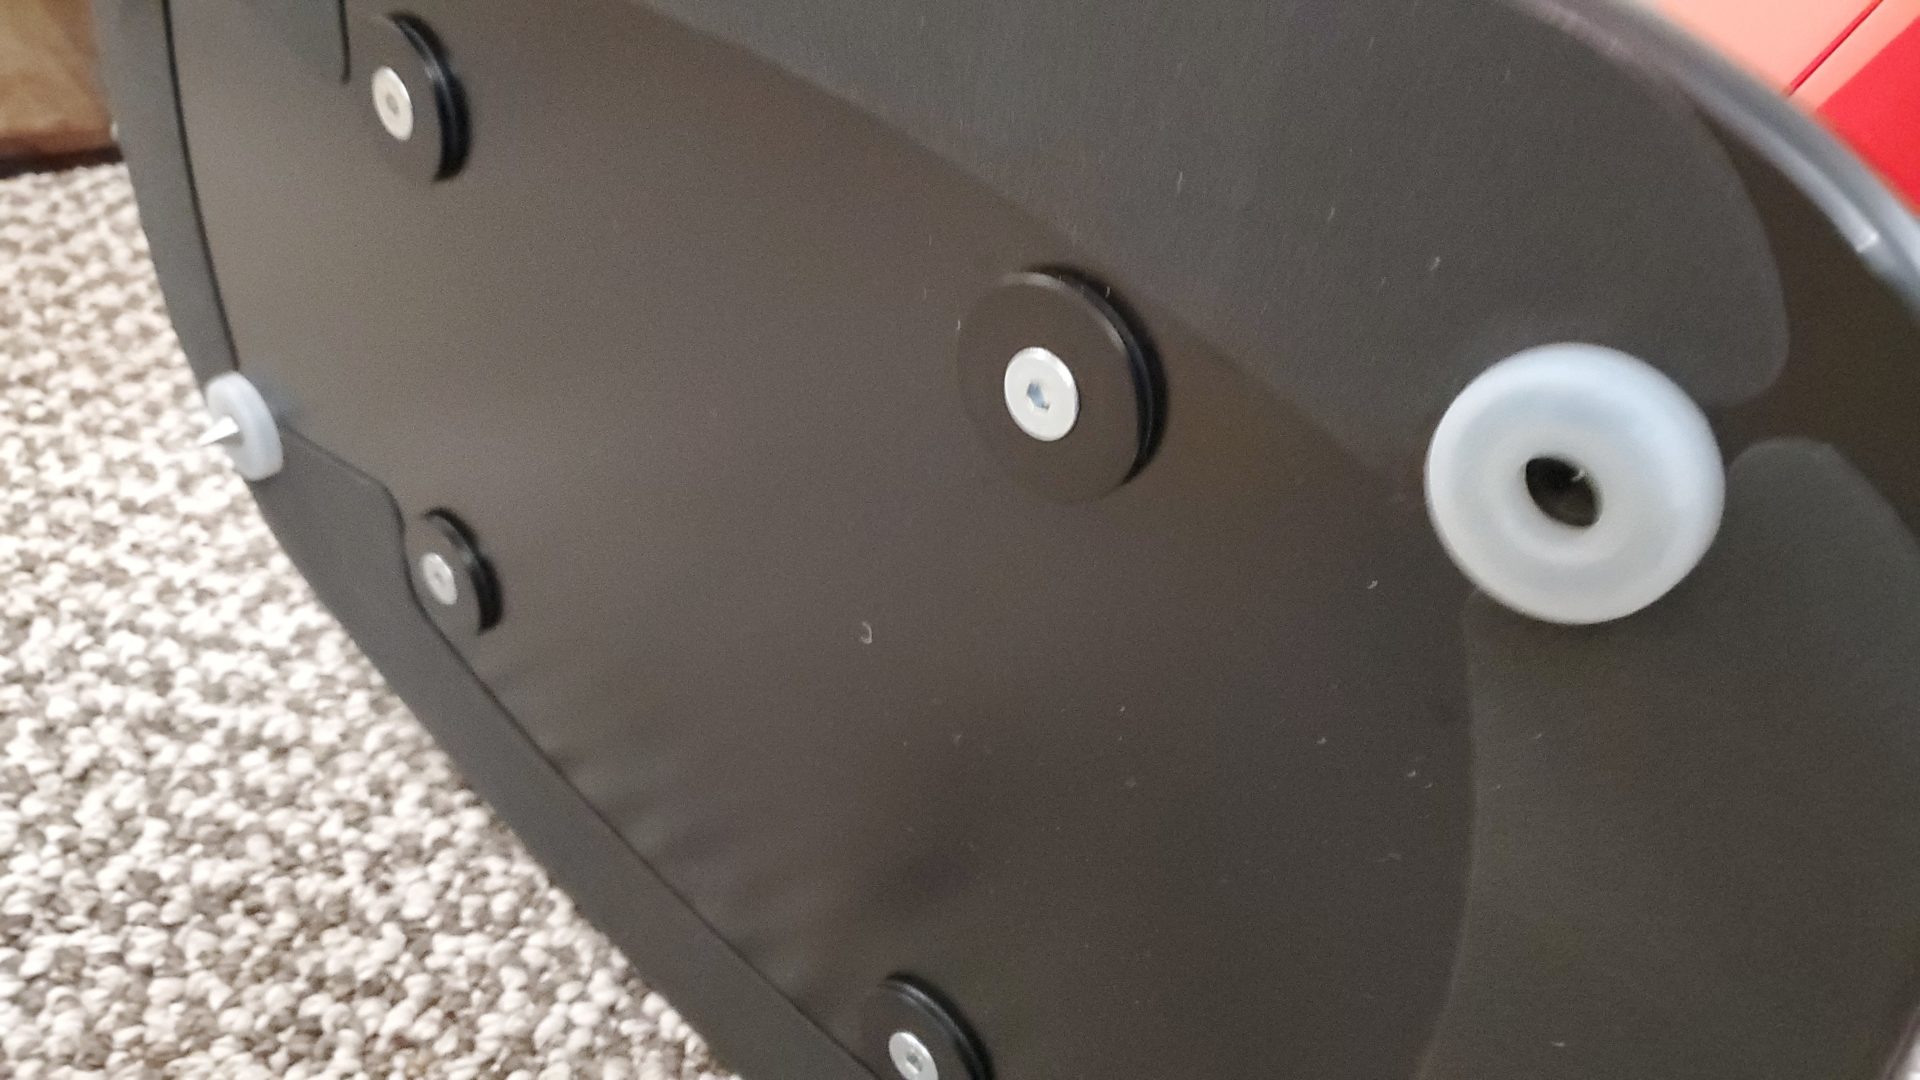
- Step 5: Now gently screw the hex screws back into place – take care not to over tighten those. but, just snug enough. Ensure that you screw those back in an opposite screws first pattern.
EXTREME CAUTION:
- As you lift, tilt and move your speakers around, TAKE EXTREME CARE to NOT TOUCH the speakers’ cones, diaphrams, etc. You do not want to damage the speakers.
Next Assemble GAIA-I isolators:
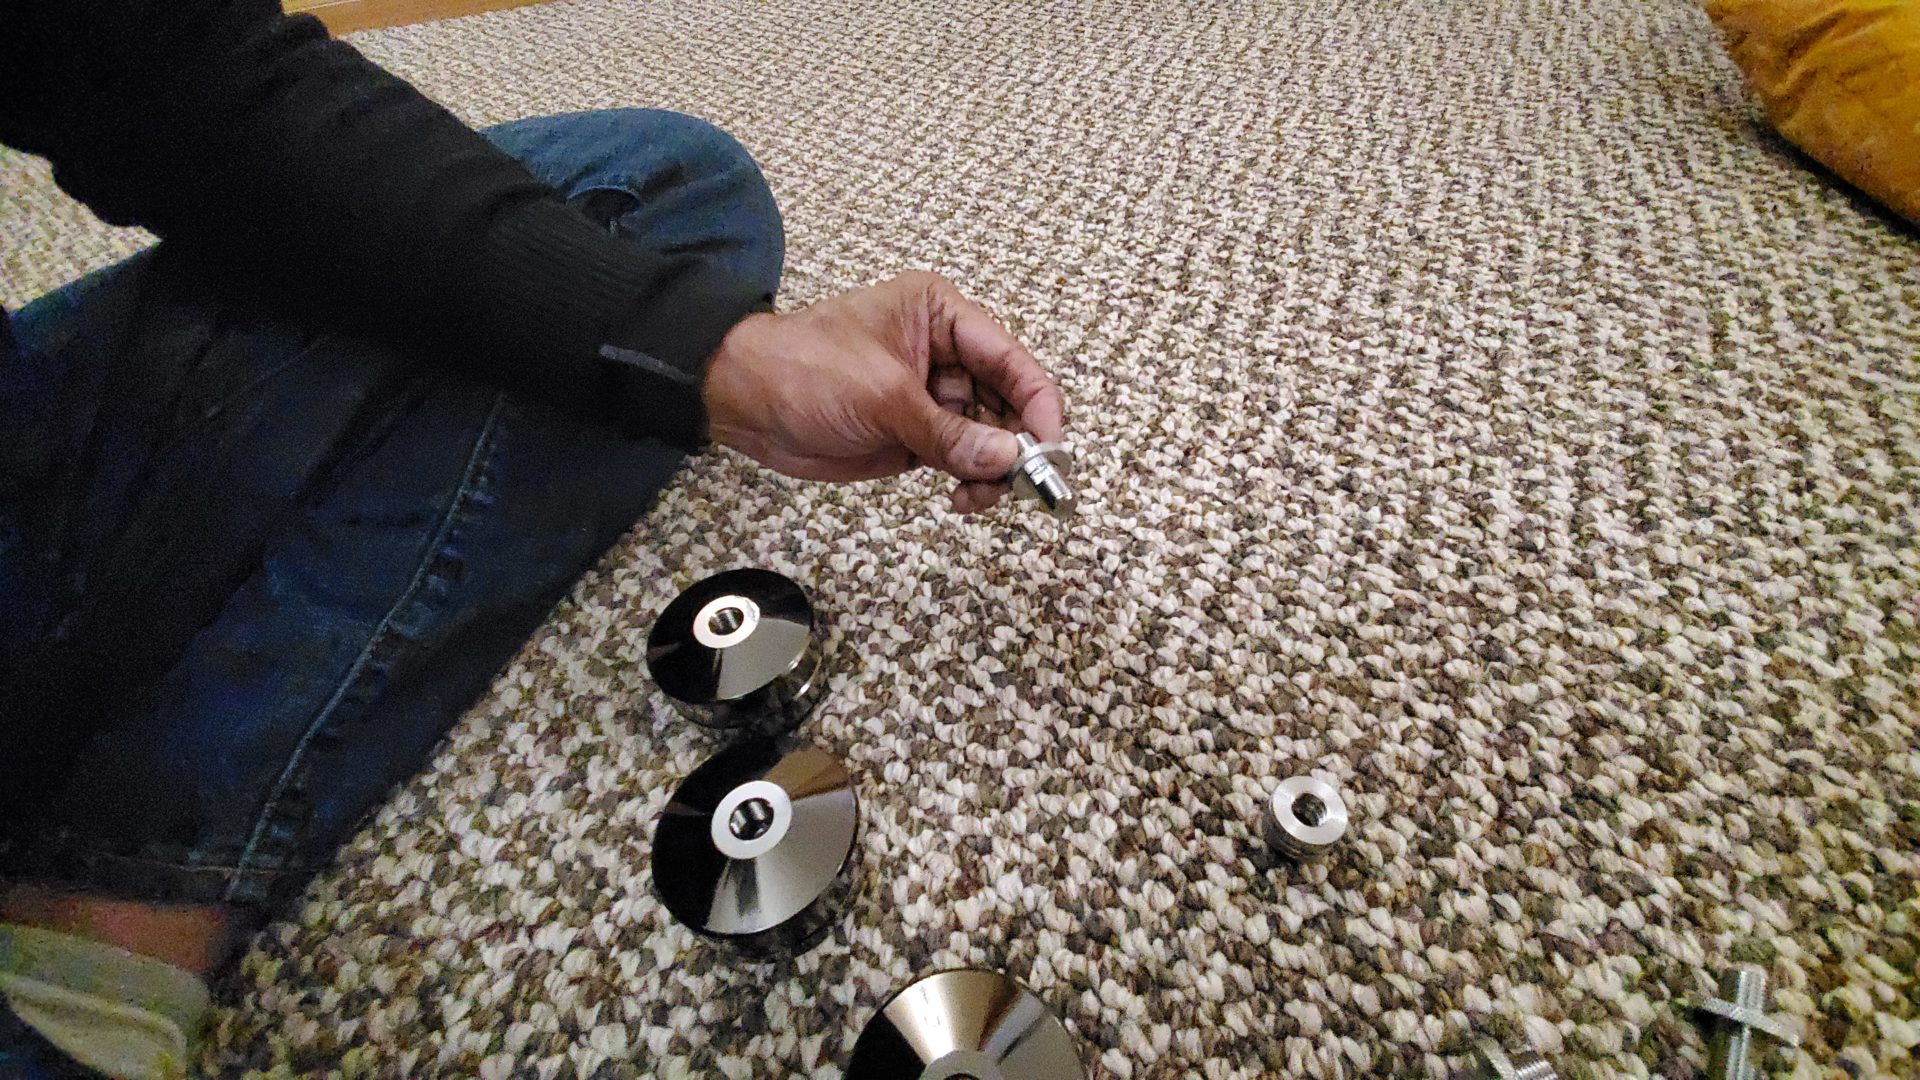
- The GAIA-I kit comes with 4 sets of isolators. Which means you will need TWO kits for TWO speakers 🙂
- The isolators kit comes with lock-nuts and an assortment of thread-screws. The largest thread-screw in the kit fits the FOCAL SOPRA No.2.
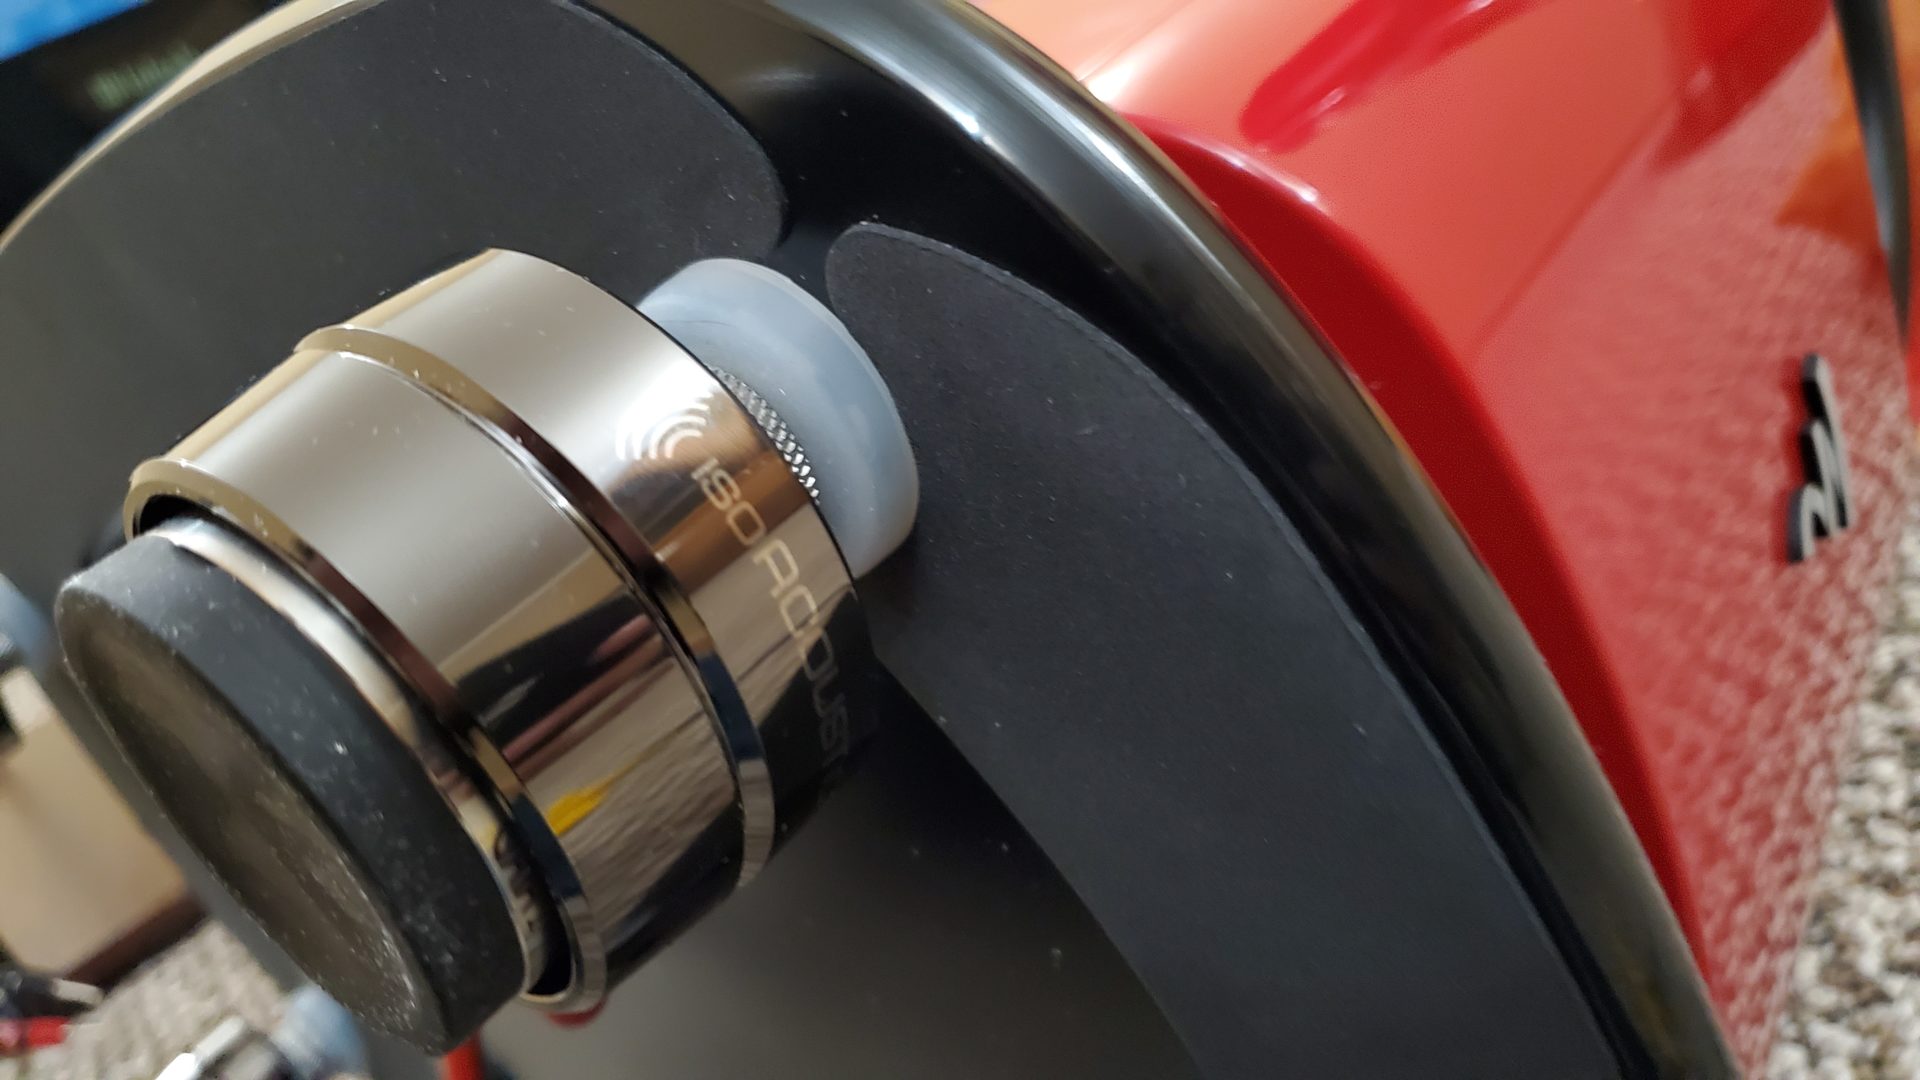
- Step 1: Thread in the thread-screw into the isolator. As you thread in, the thread-screw bottoms out into the isolator.
- Step 2: Take one of the lock nuts and thread it in – go past the center notch, till it touches the isolator’s top. Finger tighten it.
- Step 3: Take the other lock nut and thread it in till it touches the first lock nut and then back it off a couple of turns to leave some gap for fine adjustments later on.
- Step 4: Your GAIA-I isolator assembly is now ready to be mounted in the underside of the speaker’s base plate.
- Step 5: Thread in the isolator assembly from Step 4 into one of the spike threads on the underside of the speaker’s base plate. Thread it till the top lock nut touches the base plate. And, adjust such that the GAIA-I Isolator logo faces front.
- Step 6: Repeat 1-5 for the remaining 3 isolators.
Next Stand upright the speaker:
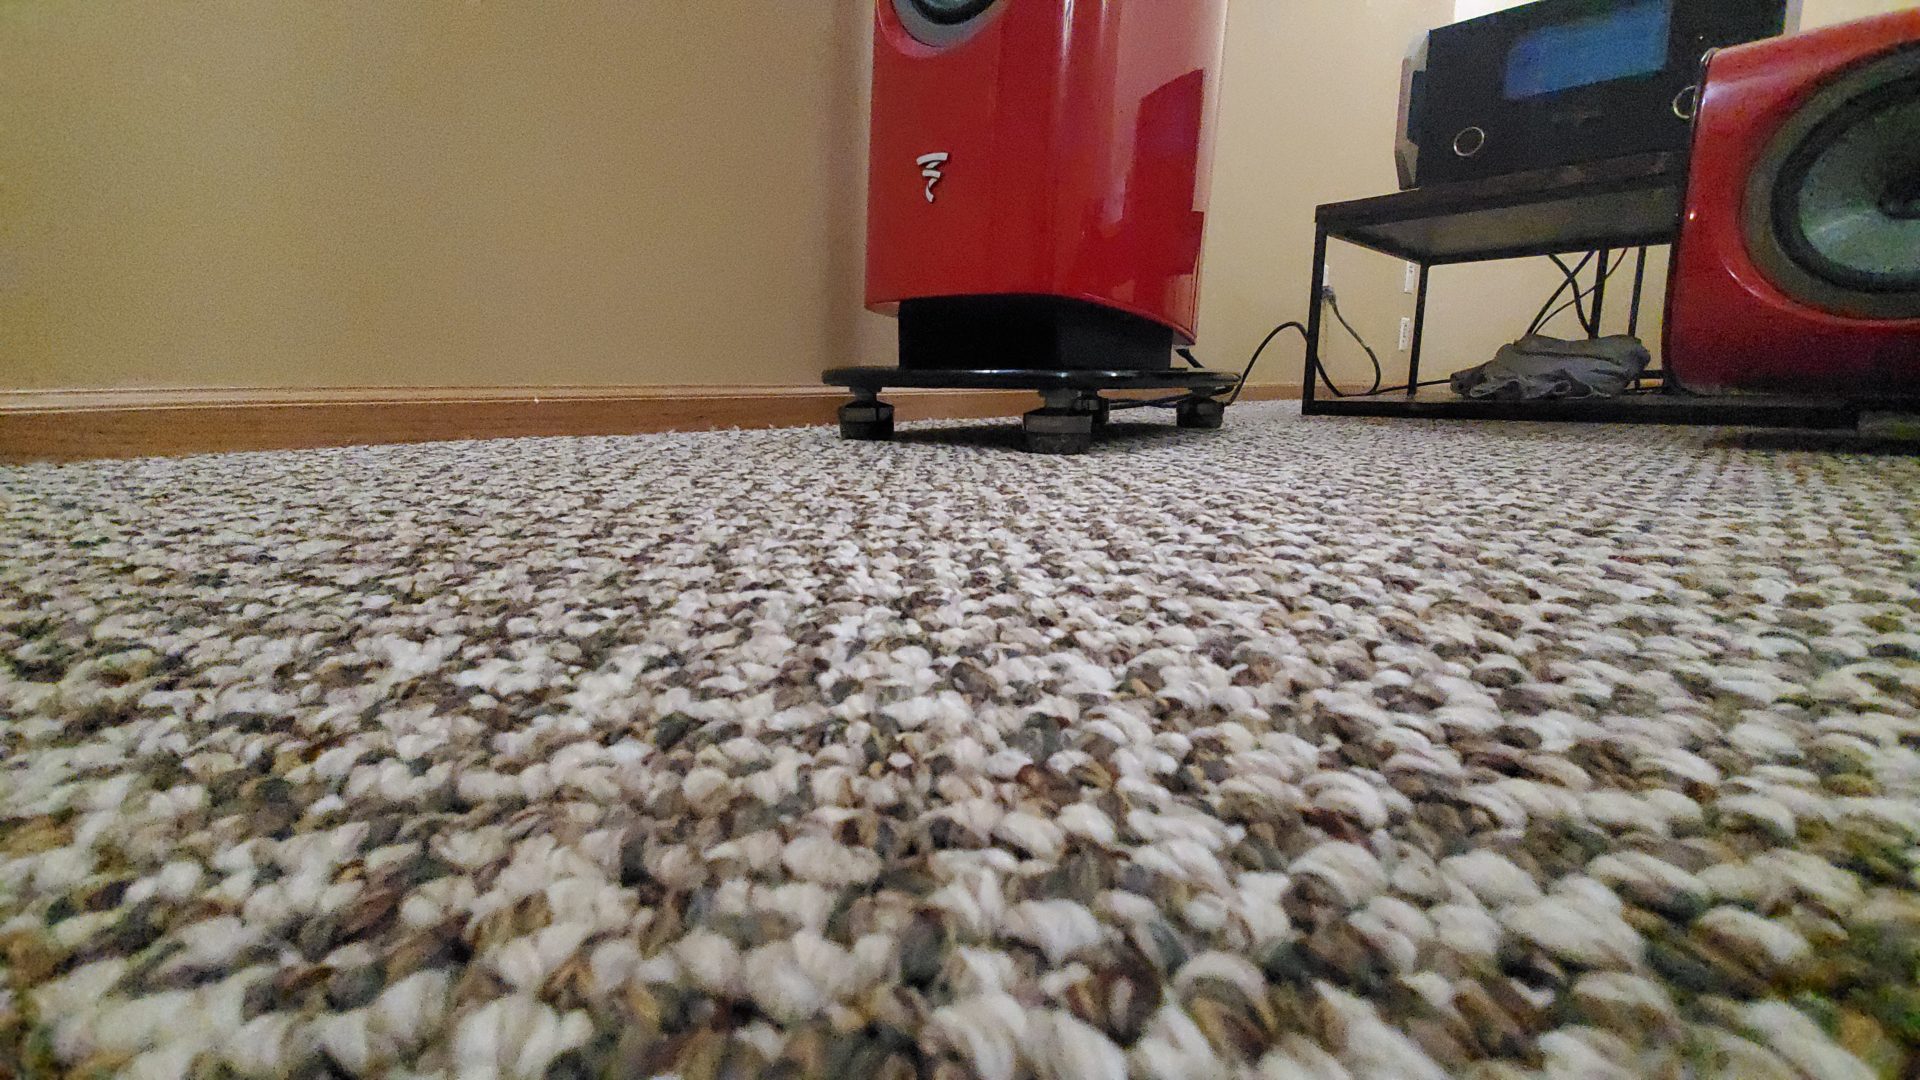
- With an extra person helping you, gently lift up the speaker and place it upright in the location and placement position you desire.
- You’re all set.
Lastly, repeat this for your 2nd speaker 🙂
MEDIA:


YOUTUBE Video: